"Automated processes are stable processes"
Alexander Blum, Chairman of the Management Board of Blum-Novotest GmbH (AB), and Wolfgang Reiser (WR), Managing Director Technology at Blum-Novotest, were available for an interview in the run-up to the major and important fall trade fairs for the machine industry (AMB Stuttgart, IMTS Chicago and JIMTOF Tokyo).

Blum-Novotest GmbH, based in Grünkraut near Ravensburg (Germany), is a global technology and innovation leader in measurement and testing technology. The company describes itself as a reliable partner to the global machine tool, automotive and aerospace industries. The company will be presenting its FormControl X software at the upcoming major industrial trade fairs AMB Stuttgart, IMTS Chicago and JIMTOF Tokyo. With this measuring and automation software, users can create complex measuring programs in a self-explanatory manner and automate machining processes by implementing closed control loops. But what else is the company interested in? Alexander Blum (AB) and Wolfgang Reiser (WR) provide the answers.
Mr. Blum, what changes do you see in the global production landscape?
AB: For some years now, we have been observing a clear trend towards five large blocs, which are formed around North America, Europe, Russia, India and China. Each of these blocks sees the need to have certain key industries in its own hands, including aerospace and defense, energy, semiconductors and medicine. Within the blocks there are highly productive production clusters, but also areas where simpler processes are automated. This relocation of production processes to the peripheral areas is a driver for automation, which is positive for us, because measuring in the process is a prerequisite for a lot of automation.
How is BLUM positioning itself for this changed world?
AB: We are installing Blum-Novotest Competence Centers (BNCC) in the USA, India and China. For Europe, our headquarters in Grünkraut is of course the Competence Center. These BNCCs are equipped with extended functions and competencies, such as local repair facilities or employees who carry out software adaptations for customer-specific processes or developments for local control systems. Product management is also being set up locally in order to reflect the requirements of the regions to us in Grünkraut. This enables us to better understand local markets and their requirements and supply them with suitable products and solutions. This gives local customers the security of receiving support even faster and with comprehensive expertise. The functional scope and size of this BNCC will continue to grow. This also changes our self-image - from "Made in Germany" to "Made by Blum-Novotest", as we have been doing for years. We are now an international company with employees at eye level in more than 20 countries.

The Competence Centers are of strategic importance for the emerging markets in particular. On the one hand, this brings more expertise directly to the local markets, and on the other hand, the local markets have the opportunity to exert more influence on future developments via the product managers. This involves, for example, control systems that are widely used locally, or adaptations and localizations in the user interface.
How are these developments reflected in BLUM products?
AB: We are constantly developing, and the high-end is increasingly being joined by an entry-level offering. However, this is not inferior, it is just simpler in some areas, for example by only providing the most important range of functions.
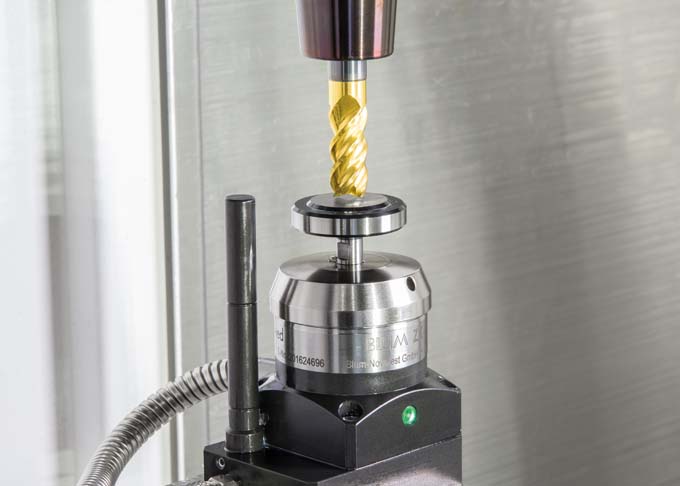
We will soon be introducing new products such as our Z-Nano LT+. This is a tool probe for tool length measurement and breakage detection, which will primarily appeal to customers who want to get into contact tool measurement. There are also existing products that fit well into these simpler process scenarios, such as our ZX-Speed series. Thanks to a multidirectional measuring mechanism, this probe can also perform radius measurements with a rotating tool by rotating the tool against the cutting direction as it touches the measuring disk. However, industry solutions such as laser measuring systems for drill-tap applications and simple machine concepts also open up the benefits of non-contact tool measurement technology to users in the entry-level sector.
At the same time, customers are also becoming more demanding ...
WR: The requirements of high-end customers continue to increase. Until recently, 5µ accuracy was sufficient, but now we are talking about 1µ and below. It is no longer just tool lengths and diameters that need to be measured, but entire cutting edge contours of circular segment cutters, for example. The result should then be visualized.
With LC-VISION, BLUM has an intuitive measuring software for the laser measuring systems in its portfolio ...
WR: With LC-VISION, not only can entire measurement sequences be visualized and evaluated, but a variety of measurement tasks can also be generated on the control screen without NC programming knowledge. Wear can be measured precisely and tools can be used up to the wear limit. The user can also analyze the progression of wear and compare tools from different manufacturers, for example. Last but not least, our DIGILOG technology produces high-quality data that is ideal for further processing using artificial intelligence.
In networked environments, the measured values can also move with the tool thanks to LC-VISION. Tools can be exchanged between machines and the new machine knows the last measurement and wear values of the tool directly. Monitoring tool wear - together with consistent use until the end of wear - offers enormous savings potential.
The flexibilization of production also means that many different workpieces need to be processed one after the other - automatically and without compromising on quality, of course. When a robot inserts the parts, the position must be measured after insertion and the processing adjusted. Success is checked after processing.
What solutions do you offer for this?
WR: Our FormControl X measuring and automation software is now available for these tasks. With FormControl X, users can create complex measurement programs in a self-explanatory way, automate machining processes by implementing closed control loops and make the measurement results usable in the sense of Industry 4.0. This makes manufacturing processes more transparent and faster, and optimizes the quality and manufacturing costs of the finished workpieces. This is not possible with a measurement in the measuring room alone, or is a major blind flight, as production continues until the measurement is taken in the measuring room and, in the worst case, only then is a deviation detected.
Let's take a look into the future: where are developments in measurement technology heading?
WR: I firmly believe in self-optimizing processes. Today, we often have the problem that the cutting tools are not manufactured as precisely as would be necessary to achieve the desired precision. If the machine measures the tools before machining, it can compensate for these deviations, as well as for wear. This is already possible today, but I believe we are moving faster and faster along this path. The machines optimize themselves and relieve the burden on competent operators, who no longer have to worry about many things themselves.
Further information: Blum-Novotest GmbH


